Ledger Live Login: A Comprehensive Guide to Secure Crypto Access
Ledger Live is the official application designed to work with Ledger hardware wallets, providing users with a secure and convenient way to manage their cryptocurrencies. Unlike typical online logins that require a username and password, Ledger Live login relies on your hardware device for authentication. This ensures that your private keys remain offline and protected, while still allowing you to access, monitor, and manage your digital assets efficiently. In this guide, we will explain everything about Ledger Live login, from setup to troubleshooting and security best practices.
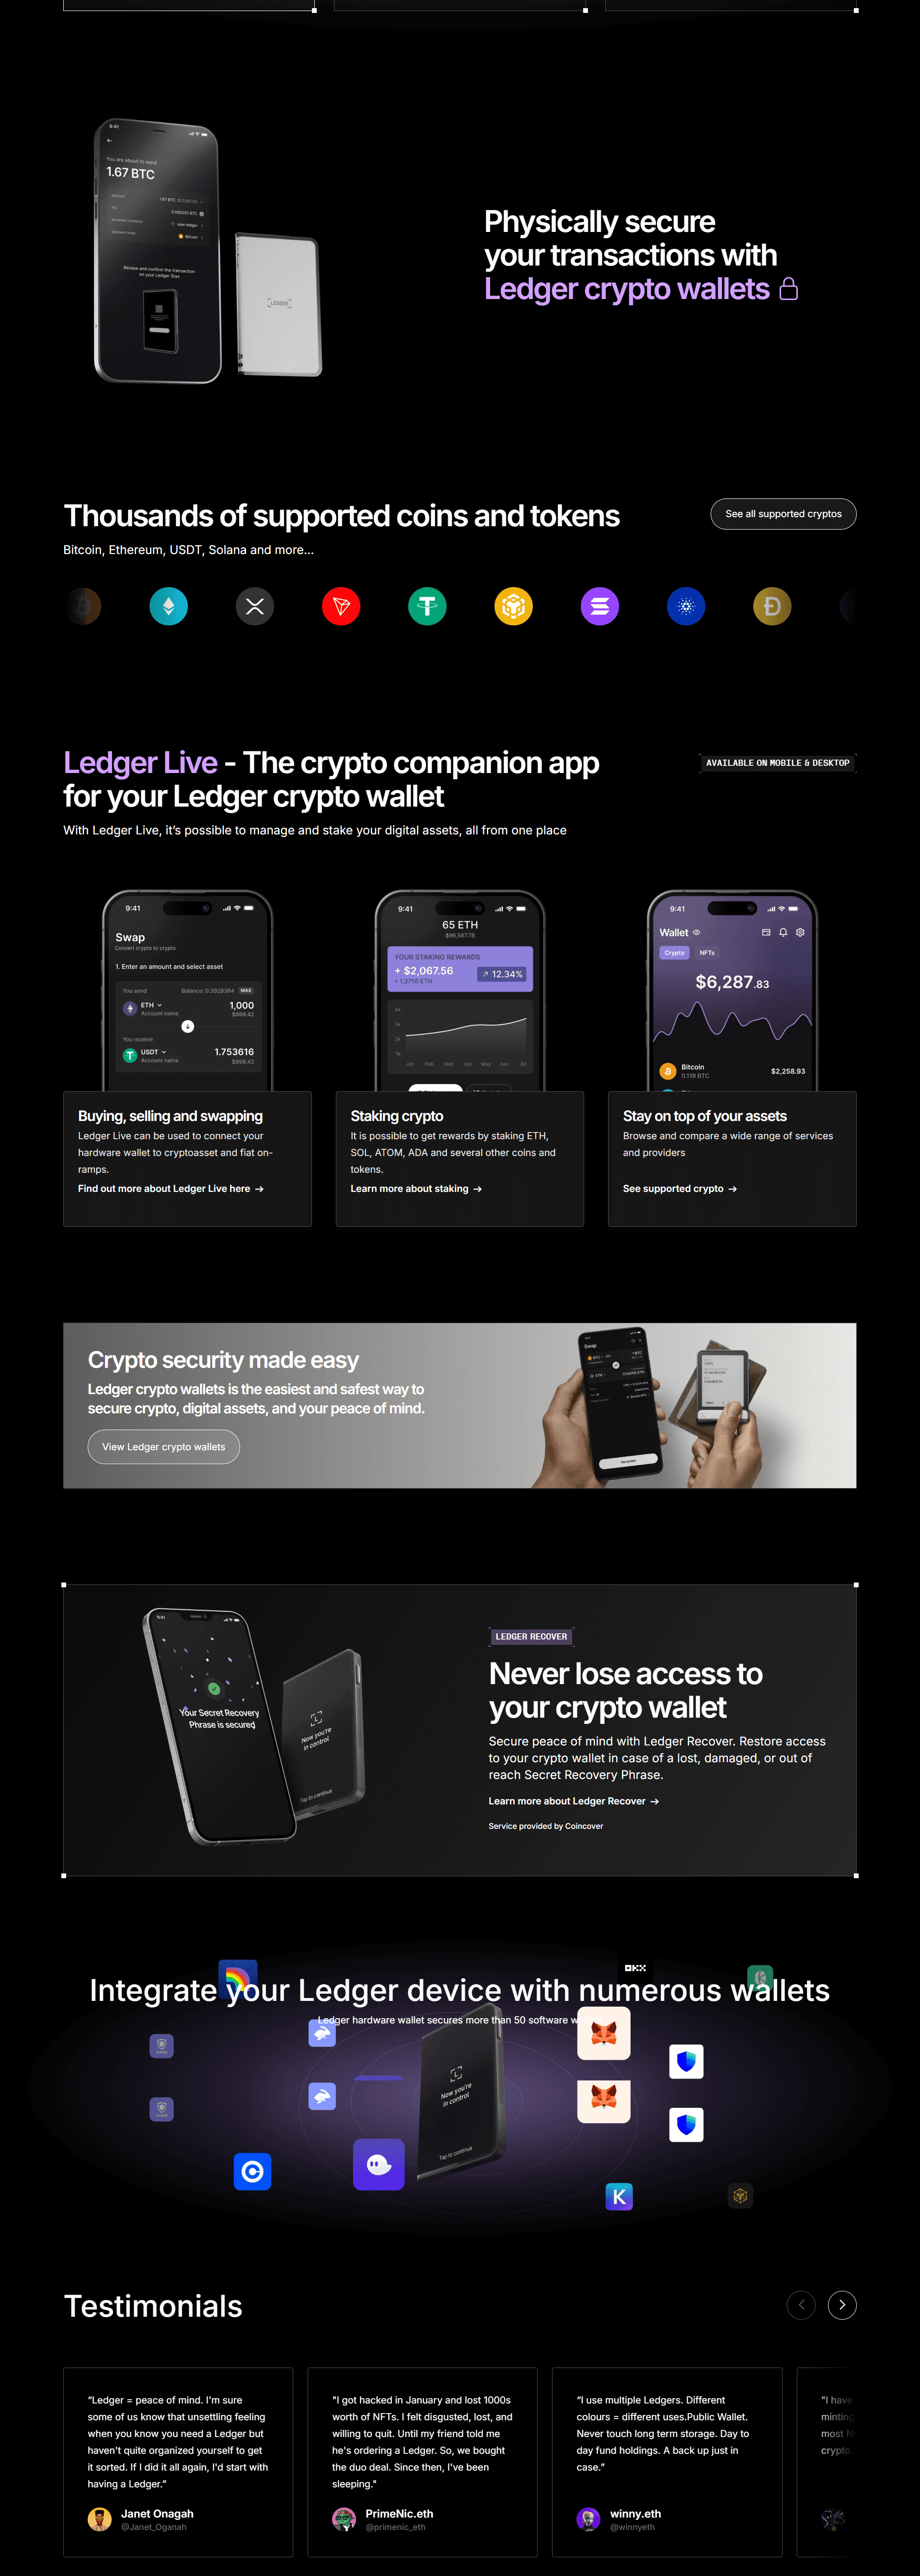
What is Ledger Live Login?
Ledger Live login is the process of connecting your Ledger hardware wallet to the Ledger Live application to access your accounts. Unlike web-based wallets, Ledger Live does not store sensitive credentials online. Instead, login is verified through your Ledger device.
Key points about Ledger Live login:
Private keys stay securely on the Ledger device.
All transactions and access require physical confirmation on the device.
Ledger Live is available on both desktop and mobile platforms.
This system ensures that your funds remain safe from malware, phishing, or online attacks.
Supported Devices and Platforms
Ledger Live login supports multiple Ledger hardware wallets and operating systems:
Ledger Nano S Plus – USB connection
Ledger Nano X – USB or Bluetooth connection for mobile access
Ledger Stax – USB connection
Supported platforms include:
Windows – Full desktop support
macOS – Secure application interface
Linux – Compatible for desktop use
Android – Mobile login via USB or Bluetooth
iOS – Mobile login via supported devices
This broad compatibility allows users to log in and manage their crypto anywhere, without sacrificing security.
Step 1: Download and Install Ledger Live
To start the login process, download Ledger Live from the official Ledger website. Do not use third-party sources to avoid fake apps or malware. Ledger Live is free for all supported platforms.
After downloading, install the app and follow the setup instructions. Ledger Live will guide you through initial configuration, such as permissions, notifications, and device pairing.
Step 2: Connect Your Ledger Hardware Wallet
Next, connect your Ledger device:
Ledger Nano S Plus or Stax: Use the supplied USB cable.
Ledger Nano X: Connect via USB or Bluetooth on compatible devices.
Ledger Live will detect the connected device and verify its authenticity before granting access to your accounts. This step prevents counterfeit devices from being used to compromise your wallet.
Step 3: Enter Your PIN
Once connected, you will be prompted to enter your PIN on your Ledger device. This step is critical for security.
Tips for a secure PIN:
Avoid common combinations like 1234 or 0000.
Memorize your PIN rather than storing it digitally.
Enter the PIN only on the hardware device, never on a computer or smartphone.
Entering the correct PIN unlocks the Ledger device and allows Ledger Live to access your accounts.
Step 4: Access the Ledger Live Dashboard
After login, Ledger Live opens the main dashboard. Here, you can:
View balances across all cryptocurrency accounts.
Send and receive crypto securely.
Swap or buy supported cryptocurrencies.
Install and manage blockchain apps on your Ledger device.
Track portfolio performance with real-time updates.
The dashboard provides an overview of your crypto holdings while keeping all private keys safely offline.
Step 5: Adding Cryptocurrency Accounts
Ledger Live allows you to add accounts for multiple cryptocurrencies. Each account corresponds to a specific blockchain, ensuring organized management of your assets.
Supported cryptocurrencies include:
Bitcoin
Ethereum
Solana
XRP
Cardano
Polkadot
Dogecoin
Litecoin
Polygon
To add an account:
Click “Add Account” in Ledger Live.
Select the cryptocurrency.
Confirm the action on your Ledger device.
The new account will appear in your dashboard for easy management.
Step 6: Sending and Receiving Crypto
Ledger Live makes sending and receiving cryptocurrency simple and secure.
Receiving Crypto
Select the account to receive funds.
Click “Receive” to generate a unique address.
Verify that the address matches what is displayed on your Ledger device.
Share the verified address to receive funds.
Sending Crypto
Select the account to send from.
Enter the recipient address and amount.
Confirm the transaction on your Ledger device.
Physical confirmation ensures that no unauthorized transaction can occur, even if your computer or mobile device is compromised.
Step 7: Installing Apps and Updating Firmware
Ledger wallets require apps for each supported cryptocurrency. Ledger Live simplifies app management:
Open the “My Ledger” section.
Connect your Ledger device.
Browse and install the desired apps.
Firmware updates can also be applied through Ledger Live. Keeping your device updated ensures security and compatibility with new cryptocurrencies and features.
Common Ledger Live Login Issues
Some users may encounter login problems:
Device not detected: Check the USB cable or Bluetooth connection and ensure Ledger Live is up to date.
Incorrect PIN entry: Enter carefully; too many wrong attempts lock the device. Use your recovery phrase to restore access if needed.
Connection issues: For mobile Bluetooth login, ensure your device is compatible and disable VPNs or firewalls if necessary.
Most issues can be resolved with a simple restart or software update.
Security Best Practices
To maintain the security of your Ledger Live login:
Download Ledger Live only from the official Ledger website.
Never share your 24-word recovery phrase.
Store recovery words offline in a secure location.
Confirm all transactions on the Ledger device screen.
Keep Ledger Live and hardware firmware updated.
Avoid public or shared computers for login.
These practices help protect your cryptocurrency from theft or unauthorized access.
Conclusion
Ledger Live login is a secure way to access and manage your Ledger hardware wallet. By combining software convenience with hardware authentication, it ensures your private keys remain offline while giving you full control of your crypto. The login process involves downloading Ledger Live, connecting your device, entering your PIN, and accessing the dashboard. Once logged in, you can manage accounts, send and receive crypto, install apps, and monitor your portfolio safely. Using Ledger Live login correctly provides peace of mind and maximum protection for your digital assets.